Showing posts with label tex-mex. Show all posts

Saturday, November 24, 2012

Mexican Hot Chocolate Pie

Comfort food has the unique ability to give you a sense of being at home. I love living in Spain, but when the occasional bout of homesickness strikes, nothing makes me feel better faster than a quick skype session with my family, a Diet Coke, and a Reese's peanut butter cup! This week was Thanksgiving, my favorite holiday, and the fact that I was not celebrating it with a marathon cooking session with the Macy's Day Parade in the background was a little depressing. I was not alone in missing America on the most gluttonous of holidays. There are many other language assistants in my town that were also faced with the prospect of no Thanksgiving 2012! Since we couldn't sit idly by while our friends and families gorged themselves 4,000 miles away, we decided to have a celebration of our own. This year, the Americans in Orense brought Thanksgiving to Galicia! We crammed 17 people from America, as well as England, Argentina, and Spain, a 17.5 lb turkey, all the comfort food staple side dishes, and four pies into our little European piso and feasted until 1 am! Despite the lack of traditional Thanksgiving ingredients in the supermercado, we were able to successfully recreate green bean casserole, mashed potatoes with gravy, cranberry sauce, creamed corn, stuffing, macaroni and cheese, and the most important, pumpkin pie! Everything was delicious and everything tasted like home. 

My favorite part of Thanksgiving, or any meal for that matter, is dessert. Out of the pies I baked this year, the one that was the least traditional was this Mexican Hot Chocolate Pie. I have expressed my love of all dishes Tex Mex, so it goes without saying that I am a HUGE fan of chocolate with a kick. I love the sensation of tasting the bitterness of dark chocolate followed by a slowly building burn of chili powder. If you have never experienced what I just described, you have got to make this pie!


This pie has a cookie crust. The original recipe calls for gingersnaps, but there were none in the supermercado. Time to improvise! I used these cinnamon cookies instead and the crust was fabulous! So, this cookie crust can be made with either gingersnaps or cinnamon graham crackers. It's up to you!


In a food processor, process the cookies until fine crumbs. Alternatively, crush cookies by placing them in a Ziploc bag and smashing them with a rolling pin. Add ginger, cinnamon, cayenne pepper, and salt and process to combine. 


Add the melted butter and stir until the crumbs are moistened.  


Press the crumb mixture firmly in an even layer on the bottom and sides of the pan. Freeze for at least 30 minutes while you prepare the chocolate filling.


Preheat your oven to 350 degrees Fahrenheit. In a small saucepan on medium heat, heat the heavy cream until just bubbling around the edges. Chop the chocolate and place in a large bowl. 


Pour the heated cream over the chopped chocolate and let sit for a minute or two. The finer you chop the chocolate, the faster it will melt! Whisk until smooth.


Whisk in the egg. Add the ginger, cinnamon, cayenne pepper, and a pinch of salt and whisk until smooth. A pinch of salt is more than you would think. For the purposes of the recipes I post on this blog, a pinch of salt is made from pinching your thumb, pointer finger, and middle finger together to grab a decent amount of salt. Remember, salt brings out sweetness so it's very necessary in dessert recipes!


Pour chocolate mixture into the chilled cookie crust. Bake for 30-35 minutes or until the filling is set on the sides, but wobbles slightly in the center. Let cool to room temperature, then chill in the refrigerator for at least 2 hours, but preferably overnight. 


Just before serving, remove the pie from the refrigerator while you prepare the cinnamon whipped cream. This is the best part! With an electric mixer or wire whisk, whip the cream, cinnamon, cayenne pepper, and salt until soft peaks form.


Spread the whipped cream on top of the pie in an even layer. Cut into the pie, take a bite, agree that spicy dark chocolate is the best flavor in the world, and devour the rest of your slice!

Mexican Hot Chocolate Pie

Recipe adapted from Allison Kave's First Prize Pies 

Ingredients:  

Cookie Crust:

1 3/4 - 2 cups gingersnap or cinnamon graham cracker crumbs
1/8 tsp grated fresh ginger
1/8 tsp cinnamon
1/8 tsp cayenne pepper
pinch of salt
8 Tbsp unsalted butter, melted

Dark Chocolate Filling:

7 oz dark chocolate, finely chopped
1 cup heavy cream
1 egg, room temperature
1/8 tsp grated fresh ginger
1/8 tsp cinnamon
1/8 tsp cayenne pepper
pinch of salt

Cinnamon Whipped Cream:

1 1/2 cups heavy cream, cold
1/4 cup sugar
1 tsp cinnamon
1/8 tsp cayenne pepper
pinch of salt

Directions:

In a food processor, process cookies until fine crumbs. Add ginger, cinnamon, cayenne pepper, and salt and pulse to combine. With the processor running, add the melted butter in a steady stream until all the crumbs are moistened. Press crumb mixture firmly onto the bottom and sides of a pie tin and freeze for 30 minutes.

Preheat your oven to 350 degrees Fahrenheit. Finely chop the chocolate and set in a large bowl. In a small saucepan over medium heat, heat the heavy cream until just bubbling on the edges. Pour the heated cream over the chopped chocolate and let sit 1-2 minutes. Whisk until smooth. Whisk in the egg. Add the ginger, cinnamon, cayenne pepper, and salt and whisk until smooth. Pour the chocolate mixture into the chilled cookie crust.

Bake for 30-35 minutes until the edges are set and the center is still slightly wobbly. Let cool to room temperature, then chill in the refrigerator for 2 hours or overnight.

Just before serving, remove pie from refrigerator. Using an electric mixer or wire whisk, beat heavy cream, sugar, cinnamon, cayenne pepper, and salt until soft peaks form. Spread in an even layer on top of the pie. Serve immediately.

Wednesday, November 14, 2012

Southwest Loaded Baked Potato

Ahhh the potato. Is there a starch more versatile than this glorious spud? What would a hamburger be without french fries? A summer BBQ without potato salad? A late night snack run to the kitchen without potato chips? Your Thanksgiving feast without mashed potatoes? And it's not just Americans that have perfected recipes highlighting this staple crop. I adore potatoes in perogies, spicy Indian curry, or Spanish tortilla just as much as the recipes I grew up with! When I bought the "on sale" sack of potatoes this week at the grocery store, instead of exploring the variety of international cuisines and cooking techniques that a potato can adopt, I decided to take the spud back to basics. We are making a baked potato!

I am guilty of fake baking potatoes in the microwave. When I'm starving, and not in my right mind, 5 minutes cooking time ALWAYS trumps 60 minutes cooking time. However, my apartment in Spain does not have a microwave. Sure, I could invest in a new appliance, but I like that I'm forced to be a little more resourceful than I am back home in my fully stocked and completely operable kitchen. Here, I am required to do a little more menu planning.

When you give a potato the hour it deserves to bake slowly in an oven, it rewards you for your patience. Its crispy exterior crunches delicately under your fork before opening to reveal a burst of steam and soft, cloud-like, creamy potato flesh. At this point, a little salt and pepper is all you need to make a baked potato sing. I'm giving it some Southwestern flair with a roasted red bell pepper, sauteed onions, an egg, and lots of melty cheese!


This is another infinitely adaptable recipe. You can fill your baked potato with just about anything you have in your fridge, including diced chicken, turkey, or ham. After you've tried my Southwest inspired recipe, tweak your potato filling to make this recipe your own!


Preheat your oven to 350 degrees Fahrenheit. Using a fork, prick the potato a few times on all sides. Rub a teaspoon of olive oil on the outside of your potato and salt and pepper liberally. Bake for 1 hour until a knife inserts easily into the potato. Set potato aside to cool briefly.
  

While your potato cools, start working on your onion and bell pepper. Heat the remaining olive oil in a saute pan over medium heat. Saute the diced onion until soft and translucent, 10 minutes. Set aside. Turn your broiler on to high and place the pepper in the oven skin side up. Check its progress often and rotate if needed to achieve an even char on the surface. If you have a gas stove, char the pepper on your burner directly over the flame.


Place pepper in a ziploc bag until cool enough to touch. This will allow steam to accumulate around the bell pepper, making it easier to peel when cool. Peel the skin from the pepper and dice the flesh.


Now, back to the star of the show! Remove a layer from the top of the potato and scrape out the insides. You can either save the inside of the potato or eat them. I almost always eat them! Leave a thin potato layer on the sides when you're hollowing it out.


Now we are to the fun part. Fill your potato with the diced onion and pepper leaving enough space at the top for.....


The egg. Just crack that baby directly into your potato.


Sprinkle some cheese on top and bake for 20 minutes at 350 degrees Fahrenheit until the egg white is set and the yolk is soft.


Here is the finished product. Fresh out of the oven, it looks quaint and semi-interesting....


but after you attack the potato with your fork and the soft egg yolk cascades over the melted cheese and roasted vegetables, you know it's time to dive in! I made a little side salad out of my leftover vegetables. Waste not, want not! 

Southwest Loaded Baked Potato

Recipe by Sweet & Savory

Ingredients:

1 medium potato
1 Tbsp. olive oil, divided
salt and pepper
1/2 medium onion, diced
1/2 bell pepper
cheese (the amount you use is up to you!) 

Directions:

Preheat your oven to 350 degrees Fahrenheit. With a fork, prick the surface of the potato a few times on all sides. Rub 1 tsp. olive oil on the outside of the potato and sprinkle liberally with salt and pepper. Bake for 1 hour until a knife inserts easily into the potato. Set aside until cool enough to handle with your hands.

While your potato cools, prepare the onion and bell pepper. Heat the remaining 2 tsp. of olive oil over medium heat. Add the diced onion and saute until the onion is translucent and soft, 10 minutes. Set aside. Heat your broiler to its highest heat setting. Place the bell pepper half under the broiler skin side up. Check the pepper's progress often, as you may need to rotate it to get an even char on all sides, and remove from oven when skin is charred black. If you have a gas stove, you can also blacken your pepper directly on your stove top over the flame. When the bell pepper skin is charred black, place in a plastic bag until cool enough to touch. Peel off the skin and dice the pepper flesh.

Slice a layer off the top of the potato and hollow the inside out with a spoon, leaving a thin layer on all sides. Fill your potato with the diced onion and bell pepper. Crack the egg on top of the vegetables and sprinkle as much cheese as desired on top. Return potato to the oven for 20 minutes, until the white is set and the yolk is still soft.

Sunday, February 19, 2012

Mexican Rice

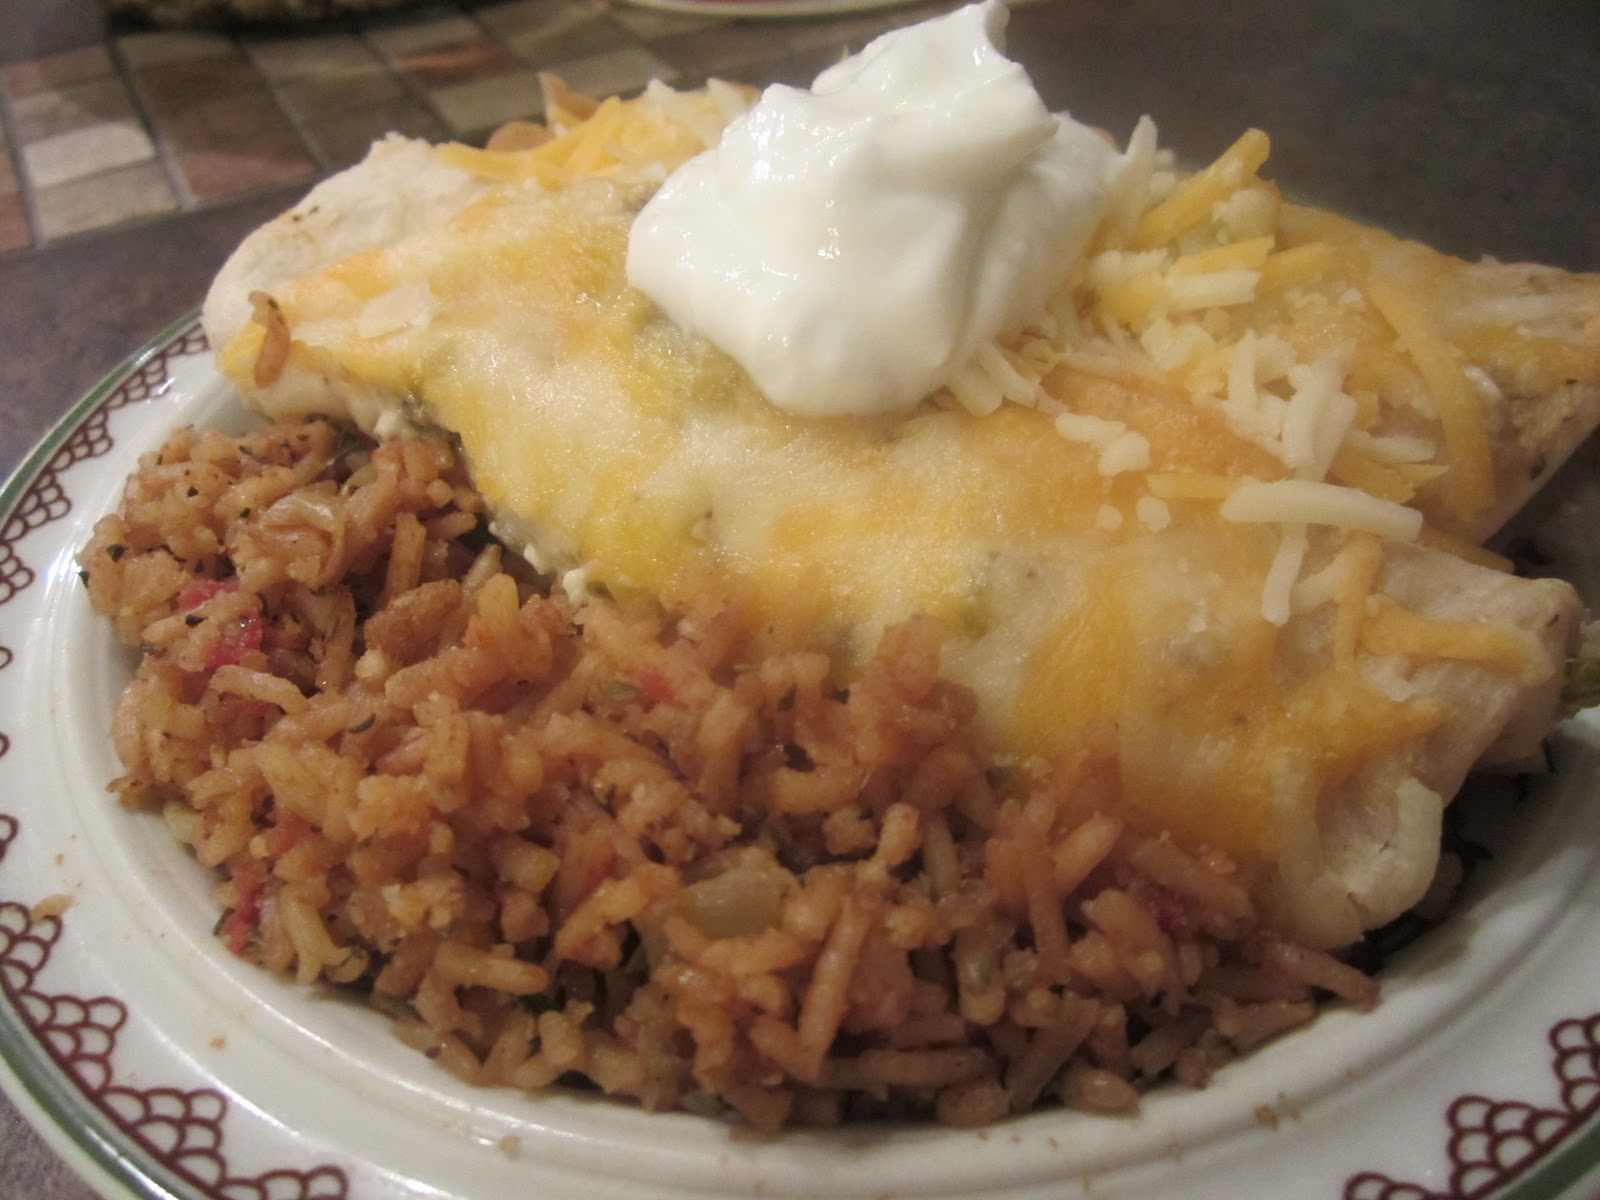
After sharing my Creamy Chicken Enchiladas post the other day, it feels only natural to share my recipe for Mexican rice. This dish is the best of both worlds; an inexpensive, one-pan recipe that is both colorful and flavorful. Just look at it! And if you like my enchiladas, which I hope you do, you will need to learn to make Mexican rice. After all, what is a Tex-Mex dish without beans and rice? It's sad that's what it is. Sad and lonely.

Rice is a great go-to side for any type of cuisine. It can be steamed, stewed, fried, or stirred to creamy perfection. From risotto to fried rice, pilaf to wild rice, and sushi to rice pudding, this little grain can take on any flavor, sweet OR savory.


In this picture, I have canned tomatoes. If at all possible, do not use canned tomatoes. A real tomato is infinitely better. On the day I made this post, I made a crucial cooking error and did not check my pantry before cooking! See, everyone makes mistakes:)


In a medium saute or cast iron pan, heat the canola oil over medium heat until it ripples.


Meanwhile, rinse the rice with lukewarm water, removing excess starch from the grains.


Add the rinsed rice to the heated oil and stir to coat. Toast rice for 10 minutes.


Lower the heat to medium-low. Add the onion to the toasted rice and cook 10 minutes, stirring occasionally, until the rice is brown and the onions are translucent.


Stir in the garlic, bell pepper, tomato, oregano, cumin, salt, and pepper. Cook for 5 minutes.


Give the rice a good stir, then pour in the chicken or vegetable broth. Bring rice to a simmer and cover. Lower heat to medium-low and simmer the rice for 30 minutes. Resist the urge to stir the rice. Just put the lid on the pan and do something very productive for half an hour. Like watching an episode of the Office.


Remove lid from the pan. At this point, the liquid should be absorbed, but the rice should not be bone dry.


Stir the rice to fluff and serve.

Mexican Rice

recipe by Sweet & Savory

Ingredients:

2 Tbsp canola oil
1 1/2 cups rice
5 cloves garlic, minced
1/2 medium onion, diced
1/2 bell pepper, julienned
1 roma tomato, sliced
2 tsp oregano
2 tsp cumin
1 tsp salt
1/2 tsp pepper
2 1/2 cups low sodium chicken or vegetable stock

Directions:

In a medium cast iron or saute pan, heat oil over medium heat. Meanwhile, rinse the rice in lukewarm water. Add the rice to heated oil and stir to coat the rice with the oil. Toast the rice for 10 minutes, stirring occasionally.

Lower heat to medium-low. Add the onion and cook 10 minutes, stirring occasionally, until the rice is brown and the onions are translucent. Add garlic, bell pepper, tomato, oregano, cumin, salt, and pepper. Cook for 5 minutes.

Increase heat to medium and stir in chicken or vegetable stock. Bring the rice to a simmer, decrease heat to medium-low, and cover. Simmer the rice for 30 minutes, do not uncover or stir the rice during this time, until the liquid is absorbed. Fluff the rice and serve warm.

**If dinner is not ready, fluff the rice, re-cover, and turn the stove to medium low. This will keep rice warm until you're ready to eat**

Thursday, February 16, 2012

Creamy Chicken Enchiladas

It is believed that food memories are some of the strongest we keep. Certain flavors and smells remind us of experiences, people, and places. For me, Tex-Mex food reminds me of the first decade of my life, spent in southern Texas and New Mexico. I can not remember many concrete occurrences from my early years, but I do remember eating bean and cheese burritos as often as other kids ate PB & J's, licking the honey and cinnamon off my fingers after sharing a dessert of hot sopapillas with my family, and begging my mom to stop by Taco Cabana for their fresh flour tortillas. My comfort food is Tex-Mex. For those of you who don't know what Tex-Mex is, it is a Mexican-American fusion cuisine. Basically, everything labeled "Mexican food" in the United States is actually Tex-Mex. Taco Bell, Chipotle, Cafe Rio, Barbacoa, Costa Vida, and all those delicious chain restaurants feature plates as authentically Mexican as fortune cookies are to Chinese food. Ground beef tacos and flour tortillas are not traditional culinary staples in Mexico, neither is it common to smother a burrito, rice, and bean platter in melted cheese, but who's complaining? It's delicious! 

And so is this recipe. The enchiladas are so easy to make, and the recipe can easily be doubled to feed a crowd. Ethnic food can be intimidating to cook because sometimes recipes call for ingredients only found at specialty stores, but since this recipe is more on the Tex-Mex than authentic Mexican side of things, all the ingredients should be readily available to you.


The enchiladas are best if assembled the night before, refrigerated overnight, and baked just before serving. You can also make and bake them in the same day. If you choose to refrigerate the enchiladas overnight, the baking time will be slightly longer because they will enter the oven cold. Either way you choose to make them, when ready to bake, preheat the oven to 350 degrees. 


In a medium mixing bowl, combine sour cream, cream of mushroom soup, minced olives, green chilies, and black pepper and salt. Personally, I do not like to add more salt to this mixture due to the high sodium content of the soup. If you like your enchiladas on the saucier side, thin the filling mixture with 1/4 cup milk.  


Spread a thin layer of the filling on the bottom of the baking dish. The size of the baking dish will be determined by the size of your tortillas and the amount of enchiladas you choose to make.


Time to build! Spread a healthy dollop of filling mixture on the tortilla,


add a little chicken,


add a little cheese,


and roll up the enchilada and place seam side down in the baking dish.


Repeat, filling all the tortillas and placing them in the baking dish. Reserve a few tablespoons of filling mixture the spread on top of the enchiladas.


Sprinkle with whatever cheese you have leftover, plus some extra if you're feeling generous, cover with plastic wrap, and refrigerate overnight.


Bake at 350 degrees Fahrenheit until the enchiladas are golden brown and bubbling, 30-45 minutes.


Let cool slightly, garnish with sour cream and cilantro, and serve with Mexican Rice. Delicioso! 

Creamy Chicken Enchiladas 

recipe by Sweet & Savory 

Ingredients:

1 cup sour cream, plus extra for garnish
1-10 oz can cream of mushroom soup
1-7 oz can diced green chilies
1-4 oz can diced black olives
1/2 tsp black pepper
1/4 tsp salt (optional) 
1/4 cup milk (optional)
2 cups shredded chicken 
2 cups shredded cheddar cheese, divided 
8 small flour tortillas OR 6-12 inch flour tortillas
chopped cilantro for garnish 

Directions:  

In a medium mixing bowl, combine sour cream, cream of mushroom or chicken soup, chilies, olives, pepper, and salt, if using. If you prefer your enchiladas on the saucier side, add the 1/4 cup of milk to thin the filling at this point. Spread a thin layer on the bottom of a baking dish. Set aside a few tablespoons of filling mixture before assembling the enchiladas. 

Spread a few tablespoons of the filling mixture, chicken, and cheese in the center of a tortilla, roll it up, and place seam side down in the prepared baking dish. Repeat, filling the remaining tortillas and placing them in the baking dish. Spread reserved filling mixture on top or the enchiladas and sprinkle with any remaining cheese. Cover with plastic wrap and refrigerate overnight.

Preheat oven to 350 degrees Farenheit. Bake the enchiladas until golden brown and bubbly, 30-45 minutes. Cool slightly. Serve garnished with sour cream and cilantro.