Showing posts with label chocolate. Show all posts

Saturday, April 6, 2013

Millionaire's Shortbread


I just returned from a freezing spring break trip to London. While I was not expecting to return from the UK with a tan, I was also not expecting it to snow twice or for all my pictures to be of my eyes peeking out over my thick knitted scarf. Thankfully we were able to stay warm ducking in and out of cafes and the free museums. Because I spent a large portion of my time in London warming my hands on a steaming mug of hot chocolate, I got very familiar with the traditional tea time snacks. Out of all the biscuits, scones, hot cross buns, and pastries I sampled, my favorite by far was the millionaire's shortbread! 

To me, shortbread cookies are delicious as they are. I love the crunch and crumble of shortbread and the slightly sweet, browned butter flavor. But the brilliant Brits have improved upon this simple treat by layering shortbread with caramel and chocolate. These delectable squares are the great grandparents of the Twix candy bar. If you like Twix, you'll love this recipe!


Preheat your oven to 350 degrees Fahrenheit. Butter and flour an 8x8 square pan. Cut the cold stick of butter into cubes.


In a food processor, pulse the flour, sugar, and salt. Add the cubes of butter and pulse until the butter is size of peas. Press the shortbread dough into the prepared 8x8 pan.


Bake 20 minutes, until the shortbread is golden brown around the edges. (this is a tad more brown than you want it! No one's perfect.) Set aside and let cool completely. 


Heat the remaining 2 Tbsp butter and sweetened condensed milk in a saucepan over medium-low heat. Bring to a boil, stirring constantly. Continue to boil for 15 minutes, until the mixture is thick and caramel colored. 
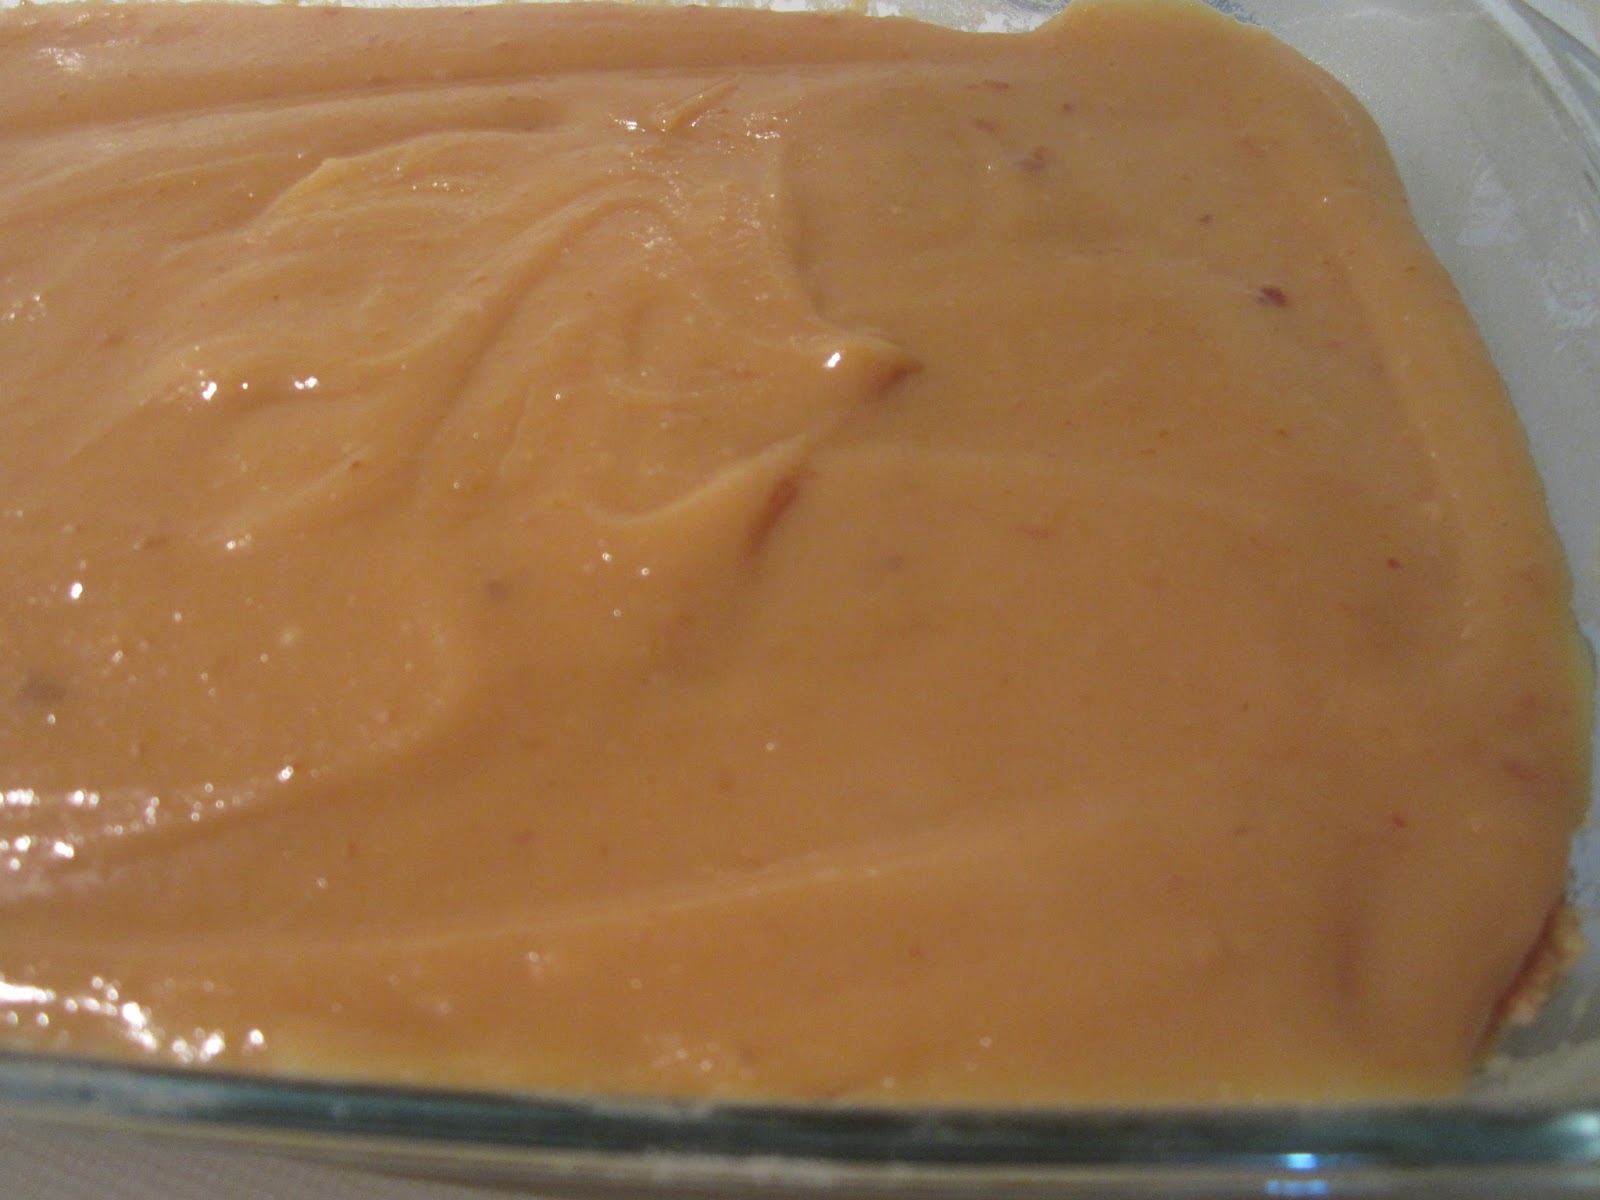

Pour the caramel over the cooled shortbread. Allow to cool completely. I let mine cool in the fridge while I made the top chocolate layer.


Using a double boiler, melt the chocolate, whisking until smooth. Pour over the caramel covered shortbread and let cool at room temperature for 10 minutes. Chill in the fridge until cooled completely.


Do you see those beautiful layers? Crunchy shortbread, sweet caramel, and bitter, smooth chocolate have never looked so good! Cut the shortbread into squares while it is cold. These squares are delicious kept cold in the fridge or softened up a little to room temperature.

Millionaire's Shortbread

recipe by Claire Robinson

Ingredients:
 
1 stick + 1 Tbsp unsalted butter, cold, divided
1 cups flour
1/3 cup sugar
1/4 tsp salt
14-ounce cans sweetened condensed milk
 6 ounces semi sweet chocolate

Directions:

Preheat the oven to 350 degrees Fahrenheit. Butter and flour an 8 x 8 square pan. 

Cut the cold stick of butter into small cubes. In a food processor, combine the flour, sugar, and salt. Pulse to combine. Add the cubes of butter and pulse until the butter is the size of peas. Press the shortbread dough into the prepared square pan. Bake 20 minutes until golden brown around the edges. Let cool completely.

In a saucepan on medium-low heat, combine the remaining 2 Tbsp unsalted butter and sweetened condensed milk. Bring the mixture to a boil, whisking continuously. Continue to boil for 15 minutes, until the mixture is caramel colored and thick. Pour over the cooled shortbread and place in the refrigerator to cool completely. 

Using a double boiler, melt the chocolate, whisking until smooth. Pour over the cooled caramel covered shortbread and let cool at room temperature for 10 minutes. Chill in the refrigerator until completely cool. Cut the shortbread into squares while cold.
 

Saturday, March 9, 2013

Pumpkin Chocolate Chip Cookies

My official job title in Spain is a Language and Culture Assistant or auxiliar de conversación. I have the best job in the world; earning a living experiencing the Spanish languages and culture. It sounds almost too good to be true, but this is a real job that you can learn more about here. In return for this amazing opportunity, I am expected to share my language and culture with the students and teachers at my school, facilitating an international exchange of ideas. However, thanks to globalization, most aspects of the American culture have already made it overseas. There are few things I share about my home that most Spaniards I meet aren't vaguely familiar with already. This is not the case for food. I'm sad to report that the general opinion of American food is based on McDonald's and KFC menus. I'm not going to launch an anit-fast food campaign over here because it is a big part of American culture and I'd be committing an enormous act of hypocrisy. I think McDonald's french fries are one of the most addicting foods on the planet and Taco Bell Crunchwraps are a work of culinary genius.  

I mentioned in my homemade pumpkin puree post that I take classic American baked goods to school to share with my coworkers and students. This is my way of showing them that we have SO much more to offer than hamburgers and delivery pizzas. It should come as no surprise that my favorite way to experience a foreign culture is through its cuisine, but I get so much more pleasure from telling people about my home through the foods I grew up with and love. With these cookies, I was able to share the traditions of autumn in America, from the holidays, to the pumpkin patches, corn mazes, and hot apple cider! I'm well aware that fall has come and gone, but who doesn't want a cakey, moist reminder of falling leaves and crisp air during the months of dreary, cold winter weather?


Preheat your oven to 350 degrees Fahrenheit. Line a sheet pan with a Silpat or parchment paper. In a stand mixer fitted with a paddle attachment, cream the butter and sugars. Add the egg, vanilla, and pumpkin and beat until combined. In a separate bowl, whisk the flour, baking powder, baking soda, salt, cinnamon, and nutmeg. Slowly mix into the cookie batter until just combined. Fold in the chocolate chips.


Using a cookie scoop or teaspoon, drop the cookies onto the prepared cookie sheet and bake for 10-12 minutes until puffed up and lightly browned. Let cool on a wire rack. Enjoy!


Pumpkin Chocolate Chip Cookies

recipe adapted from Allrecipes.com

Ingredients: 
   
1/2 cup unsalted butter, room temperature
3/4 cup sugar
3/4 cup brown sugar
1 egg
1 1/2 cups pumpkin puree
1 tsp vanilla
2 1/2 cups flour
1 tsp baking powder
1 tsp baking soda
1 tsp salt
1 tsp nutmeg
1 tsp cinnamon
2 cups semisweet chocolate chips

Directions:

Preheat your oven to 350 degrees Fahrenheit. In a stand mixer fitted with a paddle attachment, cream the butter and sugars for 2-3 minutes until light and fluffy. Beat in the egg and scrape the sides of the bowl with a rubber spatula. Beat in the pumpkin puree and vanilla.

In a separate bowl, whisk the flour, baking powder, baking soda, salt, nutmeg, and cinnamon. With the stand mixer on low speed, slowly add the dry ingredients, mixing until just combined. Fold in the chocolate chips.

Drop the batter onto a Silpat lined cookie sheet using a cookie scoop or a tablespoon. Bake in the preheated oven for 10-12 minutes depending on the size of your cookies.

Thursday, December 13, 2012

Peanut Butter Cup Cake

This is NOT a cupcake. I wrestled with the title of this post, because this cake needs to bear the name of my absolute favorite food in the world - the Reeses Peanut Butter Cup. This is a peanut butter cup...wait for it...cake. Not a peanut butter cupcake. Now, onto the recipe!

When dreaming up this cake, I wanted to use my favorite Cocoa Frosting and stay true to a peanut butter cup: luscious peanut butter coated with creamy chocolate. Thus, this variation on basic yellow cake was born, Peanut Butter Layer Cake. Naturally, I had to add peanut butter cup pieces to the cake as well. When I tried the cake the first time, there just was not enough peanut butter flavor to compliment the chocolate frosting. How did I fix this? I added more frosting! Is there such a thing as too much frosting? My Peanut Butter Cream Frosting brings all the flavors in the cake together in the perfect balance of peanut butter and chocolate, inspired by the masterfully crafted Reeses Peanut Butter Cup! I´ve said this before and will say it again- HOW can they not sell these in Europe?


After the Peanut Butter Layer Cake has cooled completely, place one layer on a cake plate or stand. Spread with a generous layer of Cocoa Frosting.


Roughly chop a dozen mini peanut butter cups.


Scatter the pieces on top of the frosted cake layer.


Top with the second cake layer and frost with remaining Cocoa Frosting. Dump the frosting on top of the cake, then gradually work your way outward, smoothing the frosting toward the edges and down the sides of the cake with an uneven spatula.
 

If you want a polished final product, dip the spatula in hot water and run along the sides of the cake to smooth the frosting. This step is purely aesthetic. The cake will taste the same either way!
 

Chop a few more peanut butter cups and scatter on top of the frosted cake. 


Prepare a piping bag (or resealable plastic bag with a corner cut off) and fill with the Peanut Butter Cream Frosting


Pipe the frosting as desired on the top and around the base of the cake. Piping frosting around the base of a cake is a great way to hide mistakes and little imperfections at the base of a cake. The professionals do it too!


Cut into the cake and share Reeses peanut butter chocolate perfection with your family and friends!

Saturday, November 24, 2012

Mexican Hot Chocolate Pie

Comfort food has the unique ability to give you a sense of being at home. I love living in Spain, but when the occasional bout of homesickness strikes, nothing makes me feel better faster than a quick skype session with my family, a Diet Coke, and a Reese's peanut butter cup! This week was Thanksgiving, my favorite holiday, and the fact that I was not celebrating it with a marathon cooking session with the Macy's Day Parade in the background was a little depressing. I was not alone in missing America on the most gluttonous of holidays. There are many other language assistants in my town that were also faced with the prospect of no Thanksgiving 2012! Since we couldn't sit idly by while our friends and families gorged themselves 4,000 miles away, we decided to have a celebration of our own. This year, the Americans in Orense brought Thanksgiving to Galicia! We crammed 17 people from America, as well as England, Argentina, and Spain, a 17.5 lb turkey, all the comfort food staple side dishes, and four pies into our little European piso and feasted until 1 am! Despite the lack of traditional Thanksgiving ingredients in the supermercado, we were able to successfully recreate green bean casserole, mashed potatoes with gravy, cranberry sauce, creamed corn, stuffing, macaroni and cheese, and the most important, pumpkin pie! Everything was delicious and everything tasted like home. 

My favorite part of Thanksgiving, or any meal for that matter, is dessert. Out of the pies I baked this year, the one that was the least traditional was this Mexican Hot Chocolate Pie. I have expressed my love of all dishes Tex Mex, so it goes without saying that I am a HUGE fan of chocolate with a kick. I love the sensation of tasting the bitterness of dark chocolate followed by a slowly building burn of chili powder. If you have never experienced what I just described, you have got to make this pie!


This pie has a cookie crust. The original recipe calls for gingersnaps, but there were none in the supermercado. Time to improvise! I used these cinnamon cookies instead and the crust was fabulous! So, this cookie crust can be made with either gingersnaps or cinnamon graham crackers. It's up to you!


In a food processor, process the cookies until fine crumbs. Alternatively, crush cookies by placing them in a Ziploc bag and smashing them with a rolling pin. Add ginger, cinnamon, cayenne pepper, and salt and process to combine. 


Add the melted butter and stir until the crumbs are moistened.  


Press the crumb mixture firmly in an even layer on the bottom and sides of the pan. Freeze for at least 30 minutes while you prepare the chocolate filling.


Preheat your oven to 350 degrees Fahrenheit. In a small saucepan on medium heat, heat the heavy cream until just bubbling around the edges. Chop the chocolate and place in a large bowl. 


Pour the heated cream over the chopped chocolate and let sit for a minute or two. The finer you chop the chocolate, the faster it will melt! Whisk until smooth.


Whisk in the egg. Add the ginger, cinnamon, cayenne pepper, and a pinch of salt and whisk until smooth. A pinch of salt is more than you would think. For the purposes of the recipes I post on this blog, a pinch of salt is made from pinching your thumb, pointer finger, and middle finger together to grab a decent amount of salt. Remember, salt brings out sweetness so it's very necessary in dessert recipes!


Pour chocolate mixture into the chilled cookie crust. Bake for 30-35 minutes or until the filling is set on the sides, but wobbles slightly in the center. Let cool to room temperature, then chill in the refrigerator for at least 2 hours, but preferably overnight. 


Just before serving, remove the pie from the refrigerator while you prepare the cinnamon whipped cream. This is the best part! With an electric mixer or wire whisk, whip the cream, cinnamon, cayenne pepper, and salt until soft peaks form.


Spread the whipped cream on top of the pie in an even layer. Cut into the pie, take a bite, agree that spicy dark chocolate is the best flavor in the world, and devour the rest of your slice!

Mexican Hot Chocolate Pie

Recipe adapted from Allison Kave's First Prize Pies 

Ingredients:  

Cookie Crust:

1 3/4 - 2 cups gingersnap or cinnamon graham cracker crumbs
1/8 tsp grated fresh ginger
1/8 tsp cinnamon
1/8 tsp cayenne pepper
pinch of salt
8 Tbsp unsalted butter, melted

Dark Chocolate Filling:

7 oz dark chocolate, finely chopped
1 cup heavy cream
1 egg, room temperature
1/8 tsp grated fresh ginger
1/8 tsp cinnamon
1/8 tsp cayenne pepper
pinch of salt

Cinnamon Whipped Cream:

1 1/2 cups heavy cream, cold
1/4 cup sugar
1 tsp cinnamon
1/8 tsp cayenne pepper
pinch of salt

Directions:

In a food processor, process cookies until fine crumbs. Add ginger, cinnamon, cayenne pepper, and salt and pulse to combine. With the processor running, add the melted butter in a steady stream until all the crumbs are moistened. Press crumb mixture firmly onto the bottom and sides of a pie tin and freeze for 30 minutes.

Preheat your oven to 350 degrees Fahrenheit. Finely chop the chocolate and set in a large bowl. In a small saucepan over medium heat, heat the heavy cream until just bubbling on the edges. Pour the heated cream over the chopped chocolate and let sit 1-2 minutes. Whisk until smooth. Whisk in the egg. Add the ginger, cinnamon, cayenne pepper, and salt and whisk until smooth. Pour the chocolate mixture into the chilled cookie crust.

Bake for 30-35 minutes until the edges are set and the center is still slightly wobbly. Let cool to room temperature, then chill in the refrigerator for 2 hours or overnight.

Just before serving, remove pie from refrigerator. Using an electric mixer or wire whisk, beat heavy cream, sugar, cinnamon, cayenne pepper, and salt until soft peaks form. Spread in an even layer on top of the pie. Serve immediately.

Tuesday, February 28, 2012

Mini Cadbury Egg Blondies

My birthday is in December. I have heard lots of December babies lament the fact that their special day is overshadowed by Christmas, but I think it's awesome. Any present on my wishlist I do not receive for my birthday inevitably ends up beneath my tree come Christmas morning. It's instant gratification and I love it. And because my birthday and Christmas fall in the same month, I go crazy with decorating. Everything inside and outside of my house must scream "THIS MONTH IS SPECIAL!" So, this year just before my birthday I wandered into Tai Pan to find something festive and not too expensive when I saw an eyesore of a Valentine's Day display. It was mid-December and we were already being sold to for February. This impatient marketing scheme happens all the time! You know, the August Halloween displays, the plastic Christmas tree aisles in October (How does that make Thanksgiving feel??), and happening in a supermarket near you, Easter Candy in February.

That is the long explanation as to why I have mini Cadbury eggs in my post. I don't particularly enjoy them right out of the bag, but baked in a blondie, now that's a different story! For those of you who don't know, blondies are brownies without the chocolate. They have the same chewy, dense texture, and like brownies, they are amazing with any mix-in imaginable. Dark chocolate peppermint blondies, coconut butterscotch, peanut butter white chocolate, the flavor possibilities are endless!


Today, I choose these. I love the color they give the blondies. You have a light caramel colored square with little pops of soft pastel peeking out at you. Very cute. Very irresistible.


This recipe can be made in one saucepan, yes saucepan, and does not require a stand mixer. Preheat your oven to 350 degrees Fahrenheit.


Cut an 8x8 square of parchment paper. You can measure using a ruler or just trace the bottom of your baking dish.


Spray the 8x8 baking dish with cooking spray. Lay two long strips of aluminum foil in the pan, forming an X. I tear a long sheet of aluminum foil, cut it in half, then fold each half into thirds. This forms two reinforced strips. Leave a few inches of foil hanging off the sides to create "handles."


Lay the 8x8 parchment paper square over the foil. Spray the parchment with cooking spray. This parchment/foil apparatus will allow you to lift the entire batch of blondies out of the pan after they are baked and cooled, making it very easy to cut them into neat, even squares.


Now, on to the blondies! In a medium saucepan over low heat, gently heat the butter until it is almost completely melted. Remove from heat and whisk until the butter is completely melted. Let cool slightly.


While you wait for the butter to cool, spread your cup of Cadbury eggs onto a cutting board and chop!


They should look like this. Uneven, crushed chocolate candies. Sample a few if you wish. I did...


Now that the butter has cooled down, add brown sugar and whisk until smooth. Whisk in vanilla and egg until batter is smooth and glossy.


Using a rubber spatula or wooden spoon, stir in flour and salt until just combined. DO NOT overmix.


Fold in the Cadbury egg pieces. The batter will be thick, almost like cookie dough.


Press the blondie batter into the prepared pan and bake for 22-25 minutes.


The edges of the blondies will be golden brown and the center should be set. Let cool completely.


When cool, use the aluminum foil "handles" to lift blondies out of the pan. Cool right? No digging blondies out of the pan for you!


What's that? A corner of my blondies is missing? That's strange....Anyway, I like to cut my blondies into strips, then into small squares.

These are chewy bites of crunchy, chocolatey perfection! 

Mini Cadbury Egg Blondies 

recipe adapted from Smitten Kitchen 

Ingredients:

1 stick unsalted butter, melted
1 cup brown sugar
1 egg
1 tsp vanilla extract
1 cup flour
1/2 tsp salt
1 cup mini Cadbury eggs, roughly chopped 

Directions:

Preheat oven to 350 degrees Fahrenheit. Spray an 8x8 baking dish with cooking spray, line with aluminum foil and parchment paper (see above). Spray parchment paper with cooking spray.

In a medium saucepan over low heat, gently heat the butter until almost melted. Remove pan from heat and whisk butter to melt completely. Let cool slightly. Meanwhile, roughly chop the Cadbury eggs.

Whisk the brown sugar into the cooled, melted butter until smooth. Whisk in vanilla and egg. Using a rubber spatula or wooden spoon, stir in flour and salt until just combined. Fold in the Cadbury egg pieces. Press blondie batter into prepared baking dish.

Bake for 22-25 minutes or until golden brown around the edges and set in the middle. Let cool completely, then use aluminum foil "handles" to lift blondies completely out of pan. Cut into small squares and serve.