Showing posts with label savory. Show all posts

Saturday, March 23, 2013

Creamy Hummus Lentil Soup

The first time I tried hummus I did not like it. Let me explain. I tried it at a Girl Scout "multicultural night" when I was eight years old. Hopefully now that first statement doesn't seem so offensive! My troop went to a regional activity to learn about the countries of the world. Moms from several different troops had set up dozens of booths in a gymnasium, each one representing a different country. They had pictures, dolls, clothing, pottery, and food at each table and a short speech prepared to give us a brief cultural background. This is something I would thoroughly enjoy now, but sadly my pea-sized eight year old attention span only made it twenty minutes. As my troop was herded from country to country, I feigned interest for the sole purpose of receiving a foreign snack at the end of my visit. Because they were adept at catering to young girls, most of these ethnic bites were cookies. Except Turkey. After sampling wedding cookies in Mexico, we touched down in the Middle East to learn about Muslims and the Black Sea. My gaze soon wandered into Germany and the enticing plate of shortbread-jam linzer cookies there. I prayed my stay in Turkey would be brief. After the presentation I was handed a baby carrot with some strange goop on the tip. Not a cookie. Definitely a vegetable. I ate it while glaring bitterly at the troop in Germany devouring their linzer cookies, greedily licking their jam-smeared lips.

I didn't try hummus again for years, but I'm happy to report that when I did, I fell in love. Today, if I'm offered hummus, veggies (yes, even baby carrots), and Stacy's Pita Chips, I'm on board. So, when I saw this recipe for lentil soup with hummus in Bon Appetit, I knew I had to make it. To make this soup, you start with a basic lentil soup, which is delicious on it's own, but then comes the brilliant twist of stirring in hummus.
The result is a creamy, thick soup that begs to be scooped into your mouth on a steaming piece of pita bread.


Pick through the lentils for small rocks or other non-lentil items and rinse well. Heat the olive oil in a stock pot on medium heat. Add the chopped carrot and onion and saute for 5 minutes. Add the garlic and a good pinch of salt and pepper and cook 5 minutes more, stirring occasionally. Stir in 2 Tbsp curry powder and cook for 1 minute, until fragrant.


Add the rinsed lentils, 4 cups of water, and the bay leaf. Bring soup to a boil, reduce heat, and simmer for 30 minutes until the lentils are soft. 


Meanwhile, make the hummus. Drain and rinse the chickpeas. In a food processor, puree the chickpeas, lemon juice, 1/4 cup water, ginger, garlic, pepper, and olive oil until smooth. Adjust lemon juice, ginger, garlic, and pepper to your taste.


Stir the hummus, 2 Tbsp olive oil, and remaining 1 Tbsp curry powder into lentil soup. The soup will be thick, so add water to thin if desired. I added 1/2 cup. Season with a few pinches of salt and pepper according to your taste.


You can actually SEE the creaminess the hummus adds to the soup. Serve with warmed pita bread and enjoy!

Creamy Hummus Lentil Soup 

recipe adapted from Bon Appetit 

Ingredients:

Lentil Soup:
 
3 Tbsp olive oil, divided
1 medium carrot, chopped
1 medium onion, chopped 
2 large garlic cloves, chopped
3 Tbsp curry powder, divided
1 cup French green lentils, picked through and rinsed
Bay leaf 

Hummus:

15 ounce can chickpeas, drained and rinsed
Juice from 1 lemon
1 tsp fresh ginger, grated
1 clove garlic, grated
1/2 tsp pepper
4 Tbsp olive oil

Instructions:
In a large stock pot, heat the olive oil over medium heat. Add the carrot and onion and cook for 5 minutes. Add the garlic and a good pinch of salt and pepper and cook 5 minutes more, stirring occasionally. Stir in 2 Tbsp curry powder and cook for 1 minute, until fragrant. Add the rinsed lentils, 4 cups of water, and the bay leaf. Bring the soup to a boil, reduce heat, and simmer for 30 minutes until the lentils are soft.

Meanwhile, make the hummus. In a food processor, puree the chickpeas, lemon juice, 1/4 cup water, ginger, garlic, pepper, and olive oil until smooth.

Stir the hummus, 2 Tbsp olive oil, and remaining 1 Tbsp curry powder into lentil soup. Add water to thin the soup if necessary. Season with salt and pepper to taste.

Thursday, March 7, 2013

Pumpkin Puree

Spanish food is very bland. I love it, but there is little flavor variation as Spaniards pride themselves on using very few spices in their cooking. I don't mind the simplicity in the savory dishes, but I have to report that Spanish baked goods are boring. Spaniards eat cakes with less flavor than a store-bought Sara Lee pound cake and exclaim "¡Què rico!" In an effort to convert some Spaniards to the worshiping of desserts with flavor, I've been baking some old-fashioned favorites and taking them to school for my colleagues. I have kept the flavors simple so as not to shock their palates; coffee cake, homemade pound cake, and most recently pumpkin chocolate chip cookies. So far, my attempts of exposing the teachers at my school to flavorful desserts has been a success. In exchange, they’ve persuaded me to open my stomach to stingray, octopus tentacles, and even tripe!

To make the pumpkin cookies, I had to make my own pumpkin puree. America is the land of good and plenty of canned pumpkin. In Spain, you cannot simply go to the grocery store to buy canned pumpkin. Even in October and November, when American supermarkets are bursting with this and other flavorful squash varieties, both canned and fresh pumpkins are absent from Spanish grocery store shelves. If you ask for a pumpkin, you'll likely be pointed in the direction of a butternut squash. (Delicious, great for making soup, but not a pumpkin.) In late October, I finally found a small sugar pumpkin at a fruit stand and when I informed the shopkeeper I planned to bake it and make it into a pie rather than carve it into a jack-o-lantern, she gave me the "Oh, you're foreign," look I've become very accustomed to. I had some leftover puree that’s been patiently waiting in my freezer, until now.  

To make your own puree, plan on an hour inactive prep time while the pumpkin bakes and no more than 30 minutes of blending and straining the puree.Straining is a very important step, especially if using to make a pumpkin pie. Baked pumpkin has a stringy texture and straining ensures a smooth final product.

Preheat the oven to 325 degrees Fahrenheit. Line a baking sheet with tin foil. Cut your pumpkin in half and scrape out the pulp and the seeds. Place the two halves skin side up on the baking sheet and roast for 45 minutes to an hour until the flesh is very tender. Remove from the oven and let cool.


Scrape the cooled pumpkin flesh out of the skin. In a blender or with an immersion blender, puree the flesh until smooth. If you're not up to dirtying more kitchen equipment, mashing the pumpkin flesh with a fork will work just fine, though it will take longer. Pour the puree through a strainer to get rid of any remaining stringy pieces. 


Now it's ready to add incredible flavor to a pumpkin chorizo pizza or a batch of pumpkin chocolate chip cookies! If not using it immediately, your homemade pumpkin puree will keep for one week in the fridge or up to one year in the freezer. Freeze it in Ziploc bags for easy storage.

Friday, November 30, 2012

Feliz Thanksgiving: 8 kilograms, Mini Ovens, & Contraband Soup

This year, I am working as an English language assistant in a public school in northern Spain. In October I left my quiet, happy life in Utah to live in a country with a different currency, measuring system, and language, 5,000 miles away from everyone I know and love. The first few weeks were a little rough with the eight hour time difference, finding an apartment, and separation anxiety from my car, but now that I am two months into my stay, I'm having the time of my life! I'm improving my Spanish, meeting new people, traveling through Europe, working with the best kids and teachers, and trying the most amazing food!

While I'm willing and excited to dive head first into Spanish culture, I'm reluctant to let go of all my Americana, including putting my napkin in my lap, my favorite TV shows (Gossip Girl, New Girl, 30 Rock, Happy Endings), and my favorite holiday, Thanksgiving! I mentioned in my Mexican Hot Chocolate Pie post that Thanksgiving is my favorite because of the menu planning, grocery shopping, hours in the kitchen, and sharing food with my loved ones. This was not my first Thanksgiving away from home, but it was definitely the first spent on a different continent. Did that drive me to deny myself a day of feasting and food comas? Never. Together with my fabulous roommates and the other language assistants in Ourense, we created a traditional Thanksgiving spread, drawing on our creativity, resourcefulness, and breaking a few airport security rules to acquire the necessary ingredients!


I'm exaggerating on the airport security rules. The green bean casserole cook bought the hard-to-find Campbell's Cream of Mushroom Soup on a weekend trip to Madrid. She had to plead her case to get it past airport security! We thanked her dedication and bravery by eating the entire casserole.


Turkey is not a common meat in Spain. In this country, ham is king. We special ordered an 8 kilo turkey (17.5 lbs) a week before our Thanksgiving feast. It did not come frozen like the butterball turkeys stocked eye high in Walmarts back home. The man at the deli sold us a fresh turkey, so fresh we had to remove a few feathers ourselves, with no giblets already removed. That presented a major gravy-making problem, but I'll get to that later.


The turkey brined in our tiny fridge overnight. Everything in my European kitchen is one size too small, including the roasting pan for the turkey! In order to prevent the bag from ripping on the turkey's feet (yes they left those on!) while it soaked in the savory herbs and spices, we double bagged the turkey, set it in a stock pot, set that stock pot in the roasting pan, and propped the bird up with Diet Coke and beer cans. That is the epitome turkey brining ingenuity!

Brown Sugar Thyme Turkey Brine

recipe adapted from epicurious.com

Ingredients:

8 quarts water
2 cups kosher salt
1 cup brown sugar
2 Tbsp black pepper
2 tsp dried thyme OR 2 bunches fresh thyme
8 garlic cloves, smashed
rind from 1 orange, peeled in large strips
rind from 1 lemon, peeled in large strips 

Directions:

In a large stockpot, combine water, salt, brown sugar, and pepper and stir until salt is dissolved. Add thyme, garlic, orange rind, and lemon rind and stir. Line a large roasting pan or stock pot with a plastic garbage bag. Rinse the thawed turkey and place in the plastic bag. Pour the brine over the turkey and tie off the plastic bag so the turkey is completely submerged in the brine. Refrigerate in the stock pot or roasting pan for 12-18 hours.


The next day, we prepared our brined turkey for roasting. At home, our turkey is set on a rack in a roasting pan to allow the drippings to collect in the bottom of the pan during roasting. Those drippings are later transformed into creamy, rich gravy. To compensate for the lack of roasting pan with a rack, the turkey roasted atop a bed of aromatics (chopped onions, carrots, celery, and apples) and was stuffed with onion, garlic, and the flesh from the lemons and oranges used in the brine. Before the bird went into the oven, I rubbed the skin with a compound butter made from room temperature butter, salt, pepper, and thyme.


As you can see, the bird took up the entire oven! I tented it with foil to prevent burning on the top and to facilitate auto-basting, similar to using a roasting bag which were nowhere to be found in the supermercado. We left the bird alone for 2 hours and 45 minutes. During this time, our power turned off twice because of the oven induced overexertion!


Nearly three hours into the turkeys roasting, I removed the tin foil and prepared a glaze. I glazed the bird three times in 15 minute intervals, rotating the pan after each coat to facilitate even browning. Finally, with the help of my stronger male roommate, the turkey was removed from the oven (it weighed a ton!), tented with foil, and left to rest for 30 minutes. It's very important to let meat rest after roasting or grilling. The resting time allows the meat the soak in the juices released during cooking. If you cut into hot steak or poultry right after it's cooked, all the juices will escape from the meat, leaving it dry and flavorless.

Brown Sugar Mustard Glaze

recipe by Martha Stewart

Ingredients:

1/2 cup brown sugar, packed
1/4 cup dijon mustard

Directions:

In a small bowl, whisk together brown sugar and mustard. Beginning 45 minutes-1 hour before the turkey is finished roasting, glaze the turkey with the brown sugar mustard mixture every 15 minutes, tenting with foil if browning too quickly.

Once the turkey had rested, we started the gravy. It took 2 people to tilt the roasting pan while 1 person held a saucepan underneath the collect the drippings! (Everything about this Thanksgiving was unorthodox!) I made a quick gravy by blending together some onion and apple slices from the roasting pan and the turkey drippings. I transferred that mixture to a saucepan, added a few tablespoons of flour, and whisked while the mixture came to a boil. Finally I added salt and pepper to taste. The gravy was slightly sweet and every one loved it!  


This was our spread! We had all the classics, turkey, mashed potatoes, gravy, cranberry sauce, two kinds of stuffing, creamed corn, green bean casserole, macaroni & cheese, and our friend from Argentina brought ham and cheese empanadas!


I loaded my plate with comfort food and joined my new friends in celebrating a tradition from our home. It was definitely a Thanksgiving to remember! We brought Thanksgiving to Spain with a fabulous dinner and decadent desserts....


Silky Smooth Pumpkin Pie


and Walnut Crumble Apple Pie!

Saturday, November 24, 2012

Quick Buttermilk Substitute

It's going to happen. More than once. You will be mid-recipe when you'll realize-yikes!-you don't have a vital ingredient. Ideally, you should make sure you have your entire ingredient list before beginning a recipe because sometimes your mental list of the contents of your pantry differs from the actual inventory of your pantry. Thank goodness for easy substitutes. In the case of buttermilk, all you need is regular milk and lemon juice or vinegar. It's not as good as the real thing, but it will do in a pinch!

Living in Spain, some recipes consist entirely of substitutes. It's very challenging and frustrating to be out of my element (pun) when cooking in another country, but it also forces me to get creative! I could not find buttermilk anywhere in the supermercado for my buttermilk pancakes, so I bought milk (which comes in a cardboard carton over here) and a lemon instead.

This recipe makes 1 cup of buttermilk. Multiply or divide to get the amount your recipe calls for. 

Buttermilk Substitute

Ingredients:
 

1 Tbsp acid (lemon juice or white vinegar)
15 Tbsp (just under 1 cup) dairy (milk, heavy cream, or half & half)

Directions: 

In a liquid measuring cup, combine acid and milk. Let sit for 5 minutes. Continue your recipe!

How to: Microwave Poached Egg

Cooking for one. It happens in dorm rooms, apartments with old appliances, or houses stuffed with so many roommates, you have to play tetris with all the items in your fridge to find a space for your milk jug.  Still, I see none of those conditions as an excuse for Ramen noodle and mac & cheese dinners every night. No one deserves that boring dining experience. My escape from boxed meals is the incredible, edible egg. You can make SO many inexpensive, quick, and tasty dishes for breakfast, lunch, and dinner with this thing! Many are familiar with the basic scrambling, frying, and hard boiling, but my cooking method of choice is neither of these. It's poaching.

Poaching eggs is done in a pot of simmering water with a splash of vinegar. It is a delicate process because the egg will easily fall apart and leave you with something resembling extremely watered-down egg drop soup if something goes wrong. While it's definitely worth the time to learn how to correctly poach an egg, there is a very convenient shortcut for those days when you're starving and need to eat NOW. The shortcut is.....the microwave! All you need is 5 minutes, a microwave safe glass, cooking spray, an egg, and you've got yourself the makings of a healthy meal.


To start, spray the inside of a microwave safe glass, mug, bowl, etc with cooking spray. Fill the inside of your cup with 2 tsp of water, barely enough to coat the bottom of the glass. Crack your egg into the glass and sprinkle with a little salt and pepper.


Time to cook! Put the glass in the microwave and cook for 30 seconds for soft yolk or 1 minute for hard yolk. Remove from microwave. If there is water left over in the bottom of the glass, tip your glass to drain the water.


Use a spoon to gently remove your poached egg from the glass.


For breakfast, serve the egg with toast. For lunch or dinner, serve on top of salad greens topped with your favorite dressing.

Wednesday, November 14, 2012

Southwest Loaded Baked Potato

Ahhh the potato. Is there a starch more versatile than this glorious spud? What would a hamburger be without french fries? A summer BBQ without potato salad? A late night snack run to the kitchen without potato chips? Your Thanksgiving feast without mashed potatoes? And it's not just Americans that have perfected recipes highlighting this staple crop. I adore potatoes in perogies, spicy Indian curry, or Spanish tortilla just as much as the recipes I grew up with! When I bought the "on sale" sack of potatoes this week at the grocery store, instead of exploring the variety of international cuisines and cooking techniques that a potato can adopt, I decided to take the spud back to basics. We are making a baked potato!

I am guilty of fake baking potatoes in the microwave. When I'm starving, and not in my right mind, 5 minutes cooking time ALWAYS trumps 60 minutes cooking time. However, my apartment in Spain does not have a microwave. Sure, I could invest in a new appliance, but I like that I'm forced to be a little more resourceful than I am back home in my fully stocked and completely operable kitchen. Here, I am required to do a little more menu planning.

When you give a potato the hour it deserves to bake slowly in an oven, it rewards you for your patience. Its crispy exterior crunches delicately under your fork before opening to reveal a burst of steam and soft, cloud-like, creamy potato flesh. At this point, a little salt and pepper is all you need to make a baked potato sing. I'm giving it some Southwestern flair with a roasted red bell pepper, sauteed onions, an egg, and lots of melty cheese!


This is another infinitely adaptable recipe. You can fill your baked potato with just about anything you have in your fridge, including diced chicken, turkey, or ham. After you've tried my Southwest inspired recipe, tweak your potato filling to make this recipe your own!


Preheat your oven to 350 degrees Fahrenheit. Using a fork, prick the potato a few times on all sides. Rub a teaspoon of olive oil on the outside of your potato and salt and pepper liberally. Bake for 1 hour until a knife inserts easily into the potato. Set potato aside to cool briefly.
  

While your potato cools, start working on your onion and bell pepper. Heat the remaining olive oil in a saute pan over medium heat. Saute the diced onion until soft and translucent, 10 minutes. Set aside. Turn your broiler on to high and place the pepper in the oven skin side up. Check its progress often and rotate if needed to achieve an even char on the surface. If you have a gas stove, char the pepper on your burner directly over the flame.


Place pepper in a ziploc bag until cool enough to touch. This will allow steam to accumulate around the bell pepper, making it easier to peel when cool. Peel the skin from the pepper and dice the flesh.


Now, back to the star of the show! Remove a layer from the top of the potato and scrape out the insides. You can either save the inside of the potato or eat them. I almost always eat them! Leave a thin potato layer on the sides when you're hollowing it out.


Now we are to the fun part. Fill your potato with the diced onion and pepper leaving enough space at the top for.....


The egg. Just crack that baby directly into your potato.


Sprinkle some cheese on top and bake for 20 minutes at 350 degrees Fahrenheit until the egg white is set and the yolk is soft.


Here is the finished product. Fresh out of the oven, it looks quaint and semi-interesting....


but after you attack the potato with your fork and the soft egg yolk cascades over the melted cheese and roasted vegetables, you know it's time to dive in! I made a little side salad out of my leftover vegetables. Waste not, want not! 

Southwest Loaded Baked Potato

Recipe by Sweet & Savory

Ingredients:

1 medium potato
1 Tbsp. olive oil, divided
salt and pepper
1/2 medium onion, diced
1/2 bell pepper
cheese (the amount you use is up to you!) 

Directions:

Preheat your oven to 350 degrees Fahrenheit. With a fork, prick the surface of the potato a few times on all sides. Rub 1 tsp. olive oil on the outside of the potato and sprinkle liberally with salt and pepper. Bake for 1 hour until a knife inserts easily into the potato. Set aside until cool enough to handle with your hands.

While your potato cools, prepare the onion and bell pepper. Heat the remaining 2 tsp. of olive oil over medium heat. Add the diced onion and saute until the onion is translucent and soft, 10 minutes. Set aside. Heat your broiler to its highest heat setting. Place the bell pepper half under the broiler skin side up. Check the pepper's progress often, as you may need to rotate it to get an even char on all sides, and remove from oven when skin is charred black. If you have a gas stove, you can also blacken your pepper directly on your stove top over the flame. When the bell pepper skin is charred black, place in a plastic bag until cool enough to touch. Peel off the skin and dice the pepper flesh.

Slice a layer off the top of the potato and hollow the inside out with a spoon, leaving a thin layer on all sides. Fill your potato with the diced onion and bell pepper. Crack the egg on top of the vegetables and sprinkle as much cheese as desired on top. Return potato to the oven for 20 minutes, until the white is set and the yolk is still soft.

Wednesday, June 20, 2012

Citrus Theme Bridal Shower

Welcome summer and my obsession with all things lemon! Like clockwork, the onset of warm weather and sunny afternoons makes me crave the sharp zing of citrus. This time of year I'll take my lemons as lemonade with a sprig of mint, squeezed over grilled fish or chicken, or baked into something sweet. I was fortunate enough to kick off my sweet and sour summer with a citrus themed bridal shower. Being the fanatical party food enthusiast that I am, I jumped at the challenge of figuring out a menu with citrus in every dish.

Immediately, my brain began to churn out citrus dessert ideas. However, out of respect to those who believe cupcakes and chocolate do not a meal make, I added some savory components. I even went as far as adding a salad to the menu.


Citrus Bridal Shower Menu

ourbestbites.com
  (bottom left) I served these in little plastic cups I bought at a restaurant supply store. Scoop a tablespoon of the dipping sauce into the bottom of the cup and stand the fries up in the sauce. This presentation turns fries and dipping sauce into finger food!  

Strawberry Citrus Spinach Salad
spinach, strawberries, mandarin oranges, candied almonds, poppy seed dressing. Simple!

Mixed Fruit with Citrus Yogurt Sauce
tasteofhome.com 

a bright Paula Deen chicken salad sandwiched into mini croissants

Chocolate Orange Cupcakes
i added orange extract and zest to my favorite chocolate cupcake and cream cheese frosting recipes. Just make sure you add them little by little until you've achieved your desired citrus flavor level.
twopeasandthierpod.com 
the best lemon bar recipe EVER

Izze Sparkling Juice
we used the cans of clementine, lime, and grapefruit flavors. So cute!

True to form, I took too few pictures of the table. Also true to form, I took 2 closeups of my favorite part of every bridal shower....DESSERTS!


Don't those just scream summer? The best part of this menu was how much could be made in advance. The honey lime dipping sauce, chicken salad, and citrus yogurt sauce was made the night before so the flavors had plenty of time to blend and intensify. I baked the lemon bars and the cupcakes the night before, but saved the frosting for the day of the party. Remember, when planning a shower or dinner party, do as much in advance as possible. Your guests want to see YOU at the party as well as enjoy your culinary truimphs!

Monday, March 12, 2012

Homemade English Muffins

Is there anything more comforting than the smell of toast? I heard somewhere, probably a reputable source like the radio or wikipedia, that the smell of toast instantly relieves stress because it reminds people of home. For me, the smell of toast makes me hungry. It does not matter if I've just eaten, if I smell toast, I want some!

This is NOT a post with instructions on how to make toast. We are more adventurous in the kitchen than that! This post is about making English muffins at home. And believe me, these are better than the store bought version. These muffins are not made in a muffin tin like their blueberry or poppy seed counterparts. English muffins are cooked on a griddle like a pancake. Once cooked and cooled, these muffins are very toastable.


This is a yeast-leavened recipe, so plan on these muffins taking a few hours start to finish because you have to factor in dough rising time.


Pour the yeast onto the warm water. Let sit for 10 minutes.


Meanwhile, heat the milk in a small saucepan until it bubbles around the side of the pan. Stir in the sugar until dissolved and remove from heat.


Check the yeast. At this point, the yeast should be bubbly and activated.


In the bowl of a stand mixer with a dough hook attachment, combine the warm milk mixture, yeast, melted shortening, and 3 cups of flour. Stir on medium speed until combined.


Stir in the salt and remaining 3 cups of flour until the dough comes together to form a soft dough.


Let the stand mixer continue running for 10 minutes on medium speed, kneading the dough.


Place kneaded dough into a well oiled bowl and cover with a towel. Let sit in a warm place in your kitchen until doubled in size, 1 - 1 1/2 hours.


Look at that yeast action! Punch down the dough and turn it out onto a well floured surface.


Roll the dough out to 1/2 inch thickness. Cut out circles using a biscuit cutter or round cookie cutter.


Line a baking sheet with parchment paper or a silpat. Dust with cornmeal.


Place the rounds of dough onto the cornmeal. Sprinkle more cornmeal over the tops of the rounds to coat both sides.


Let rise on the baking sheet for 30 minutes.


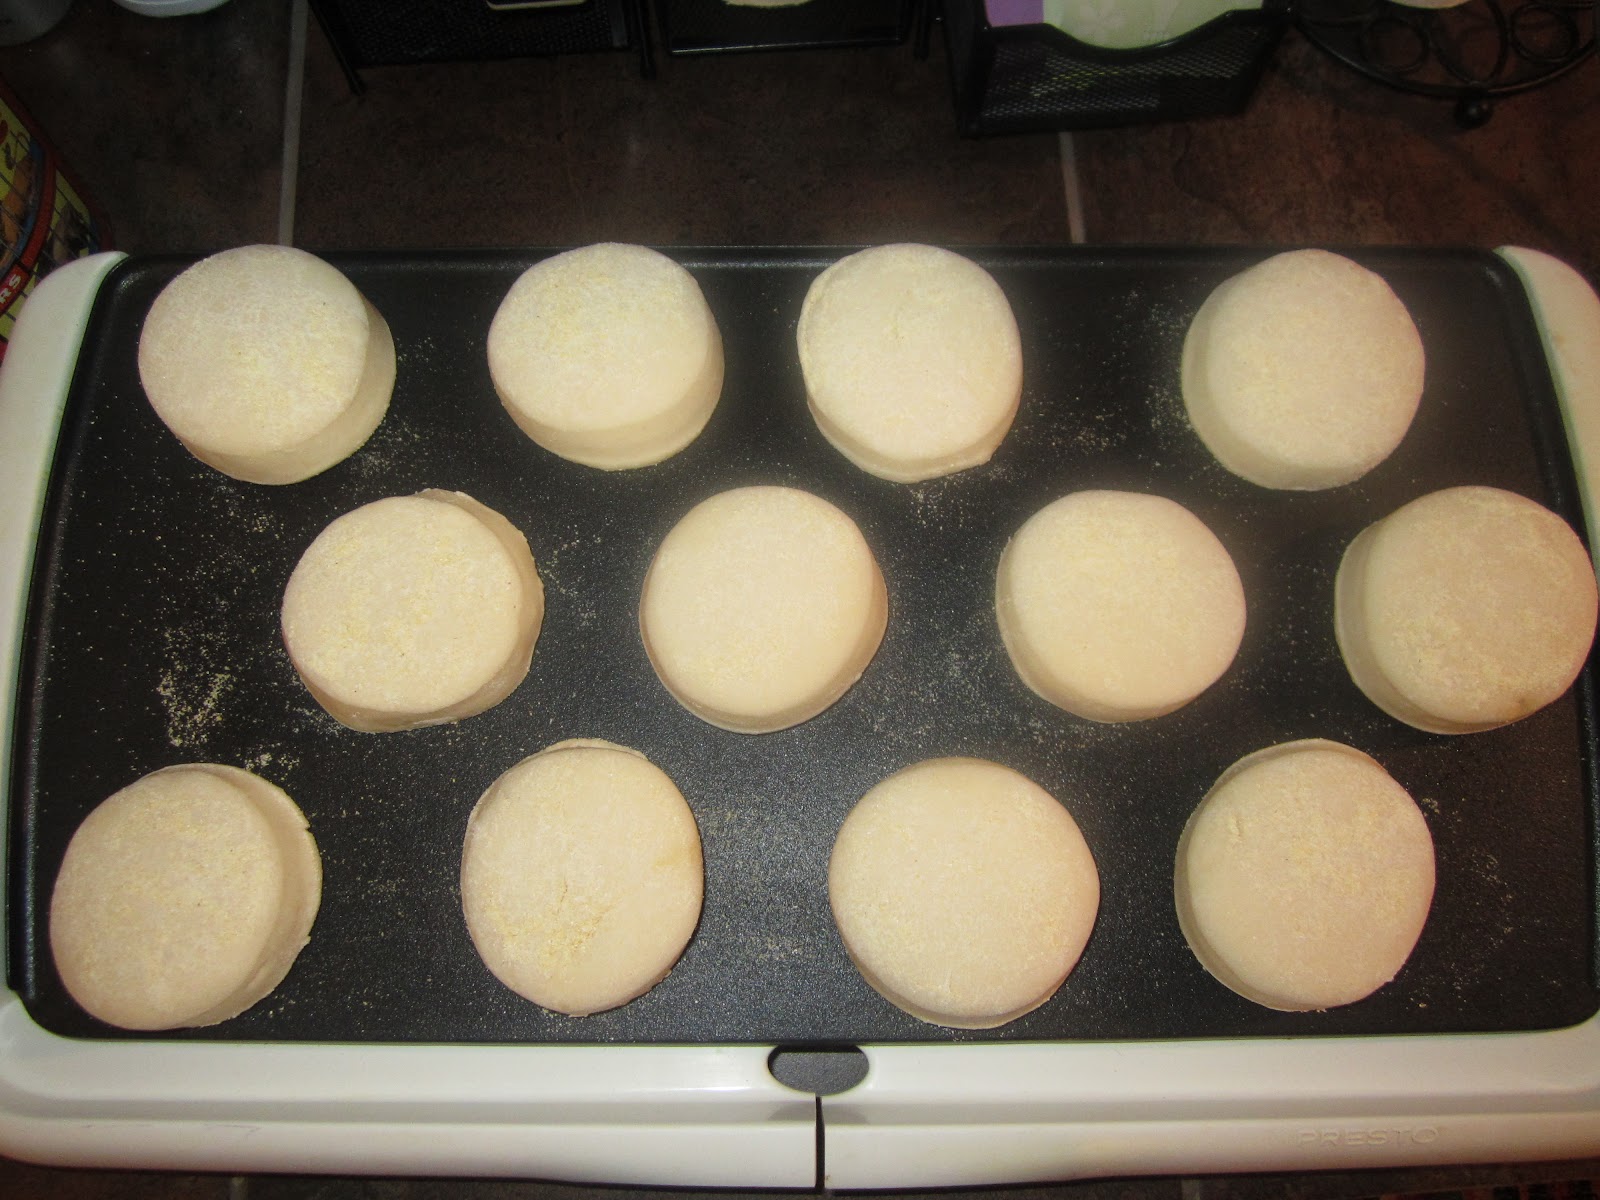
Preheat your griddle to medium heat and spray with cooking spray. Cook the muffins for 12-14 minutes until bottom side is browned.


Flip muffins and cook for 12-14 minutes more until browned on both sides.


Remove muffins from the griddle and let cool completely on a wire rack. This is a VERY important step. When these muffins come off the griddle, they continue to bake internally. This is called carry over baking. If you slice a hot english muffin in half before it has the chance to cool, the center will be gummy because it hasn't finished baking yet. So be patient. It'll pay off! When they are cool, slice open a muffin and spread with butter, jam, honey, cream cheese, or delicious Cinnamon Honey Butter


Homemade English Muffins

recipe adapted from Allrecipes.com

Ingredients:

1 cup milk
2 Tbsp granulated sugar
2 1/2 tsp yeast
1 cup warm water
1/4 cup Crisco, melted
6 cups flour
1 tsp salt
cornmeal, for dusting

Directions:

In a small bowl, pour the yeast onto the warm water. Set aside for 10 minutes, allowing the yeast to activate and become bubbly.

Meanwhile, heat milk in a small saucepan over medium heat until it bubbles around the edges. Add the sugar, stirring until dissolved completely. Remove from heat.

In the bowl of a stand mixer fitted with a dough hook, combine heated milk and sugar mixture, yeast, melted shortening, and 3 cups of flour. Stir on medium speed until combined. Add salt and remaining 3 cups of flour, continuing to stir on medium speed until the dough comes together to form a soft dough. Keep the stand mixer running on medium speed for 10 minutes, kneading the dough.

Place kneaded dough in a well-oiled bowl. Cover with a towel and place in a warm space in your kitchen. Allow dough to rise for 1 - 1 1/2 hours until doubled in size.

Punch down dough. On a lightly floured surface, roll dough out to 1/2" thickness. Cut circles out of the dough using a round cookie or biscuit cutter. Line a baking sheet with wax paper or a silpat and dust with cornmeal. Place the circles of dough onto the cornmeal covered baking sheet. Sprinkle the tops of the rounds with cornmeal. Allow rounds of dough to rise 30 minutes more on the baking sheet.

Preheat griddle to medium heat and spray with cooking spray. Cook muffins 12-14 minutes per side, until browned. Allow to cool completely on a cooling rack before slicing. Toast and serve with honey, jam, butter, cream cheese or Cinnamon Honey Butter.