Showing posts with label breads. Show all posts

Monday, March 12, 2012

Homemade English Muffins

Is there anything more comforting than the smell of toast? I heard somewhere, probably a reputable source like the radio or wikipedia, that the smell of toast instantly relieves stress because it reminds people of home. For me, the smell of toast makes me hungry. It does not matter if I've just eaten, if I smell toast, I want some!

This is NOT a post with instructions on how to make toast. We are more adventurous in the kitchen than that! This post is about making English muffins at home. And believe me, these are better than the store bought version. These muffins are not made in a muffin tin like their blueberry or poppy seed counterparts. English muffins are cooked on a griddle like a pancake. Once cooked and cooled, these muffins are very toastable.


This is a yeast-leavened recipe, so plan on these muffins taking a few hours start to finish because you have to factor in dough rising time.


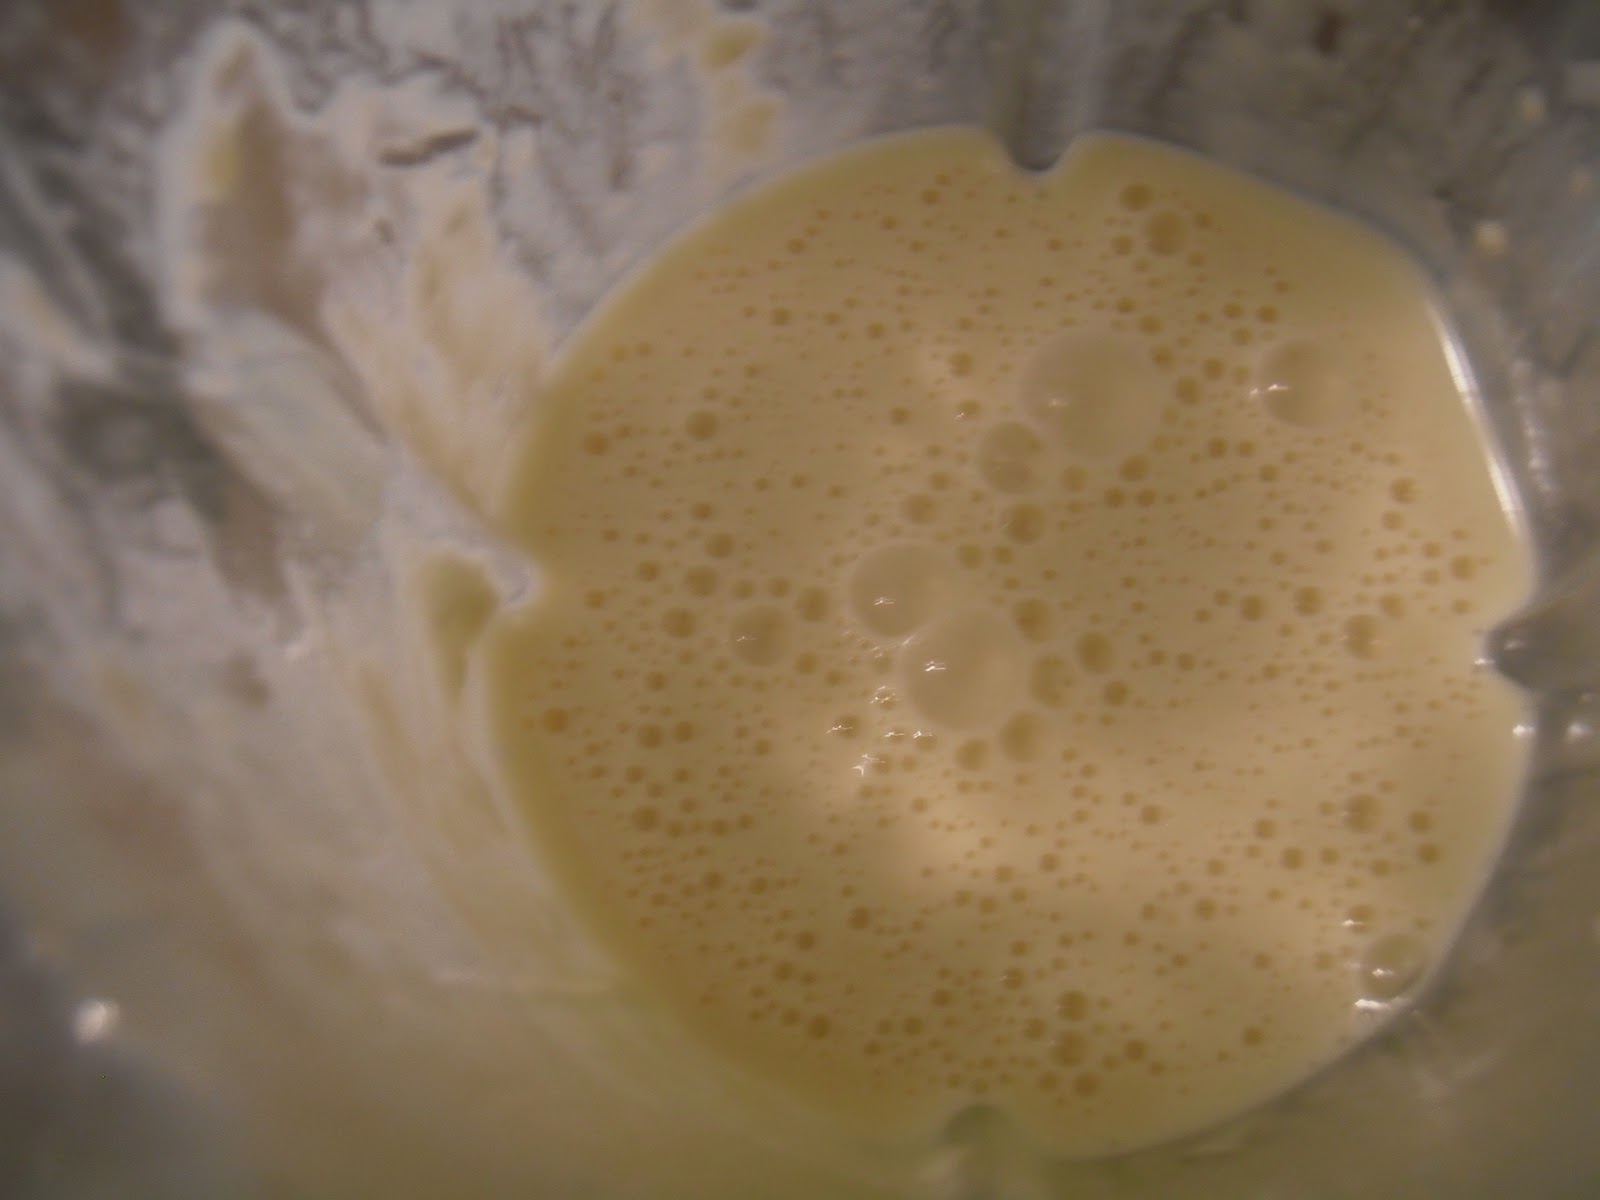
Pour the yeast onto the warm water. Let sit for 10 minutes.


Meanwhile, heat the milk in a small saucepan until it bubbles around the side of the pan. Stir in the sugar until dissolved and remove from heat.


Check the yeast. At this point, the yeast should be bubbly and activated.


In the bowl of a stand mixer with a dough hook attachment, combine the warm milk mixture, yeast, melted shortening, and 3 cups of flour. Stir on medium speed until combined.


Stir in the salt and remaining 3 cups of flour until the dough comes together to form a soft dough.


Let the stand mixer continue running for 10 minutes on medium speed, kneading the dough.


Place kneaded dough into a well oiled bowl and cover with a towel. Let sit in a warm place in your kitchen until doubled in size, 1 - 1 1/2 hours.


Look at that yeast action! Punch down the dough and turn it out onto a well floured surface.


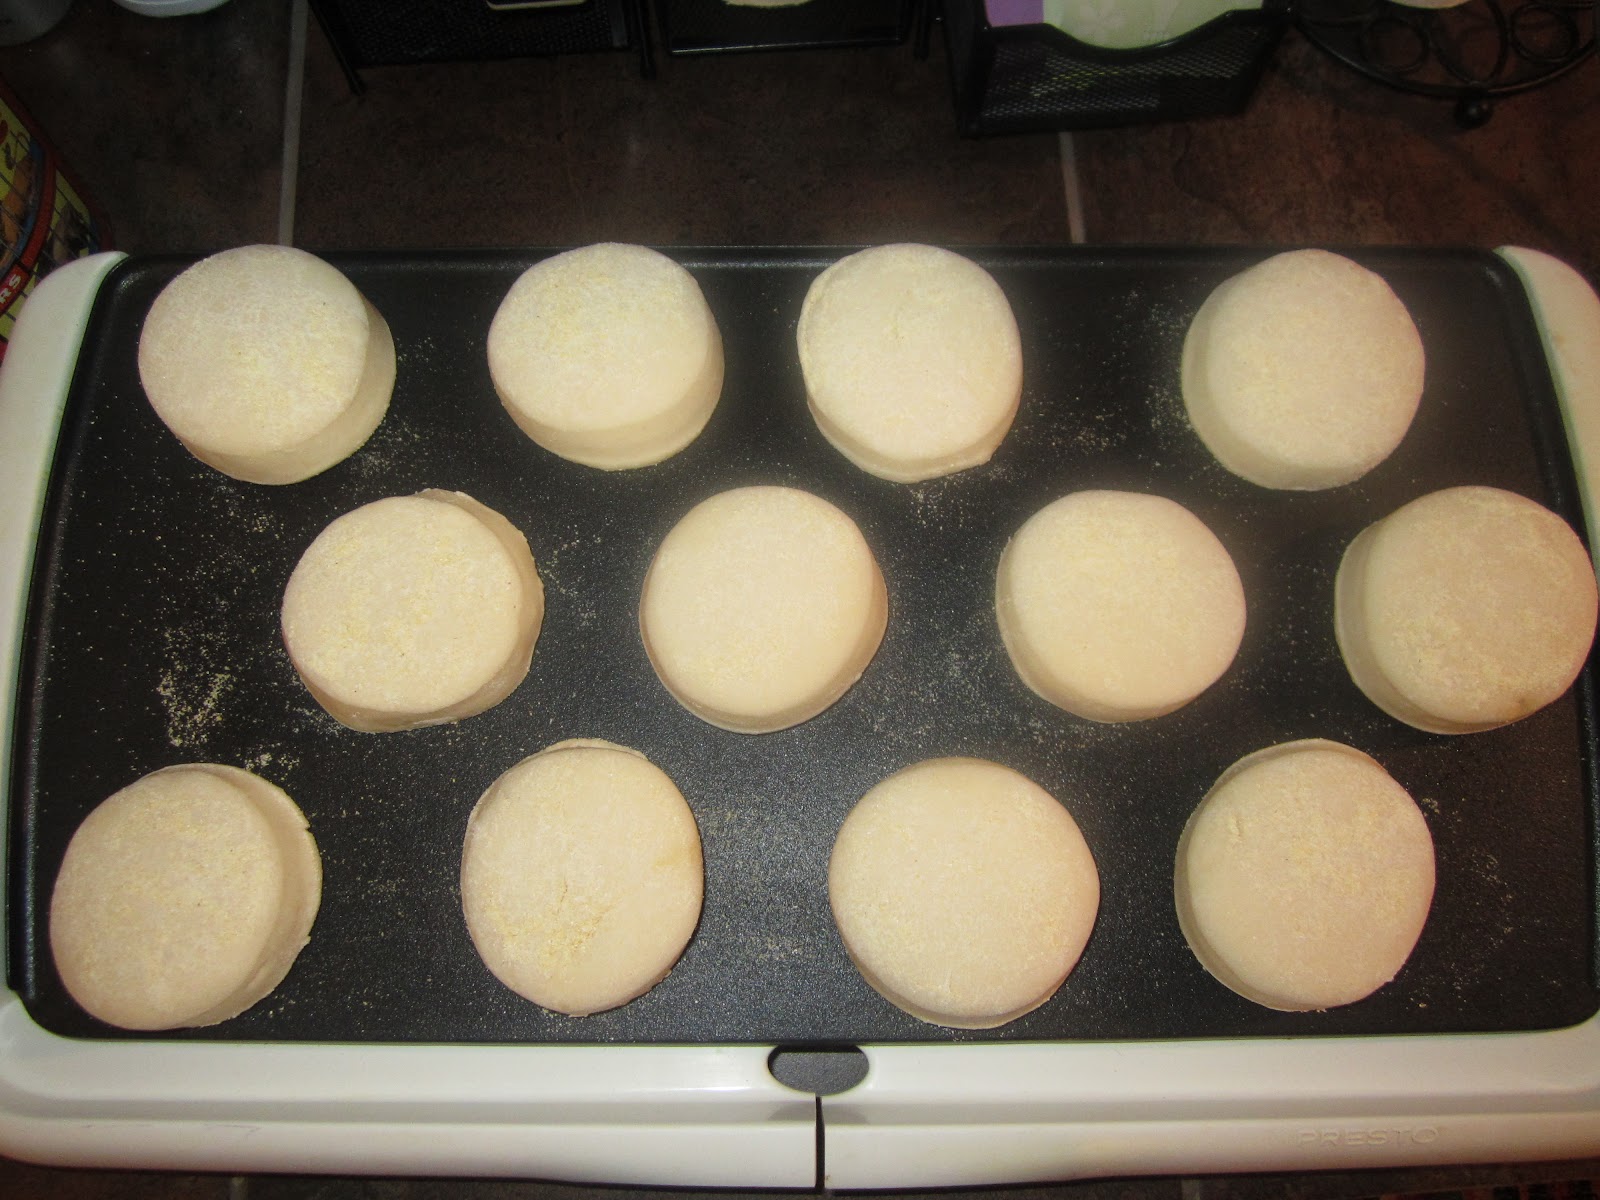
Roll the dough out to 1/2 inch thickness. Cut out circles using a biscuit cutter or round cookie cutter.


Line a baking sheet with parchment paper or a silpat. Dust with cornmeal.


Place the rounds of dough onto the cornmeal. Sprinkle more cornmeal over the tops of the rounds to coat both sides.


Let rise on the baking sheet for 30 minutes.


Preheat your griddle to medium heat and spray with cooking spray. Cook the muffins for 12-14 minutes until bottom side is browned.


Flip muffins and cook for 12-14 minutes more until browned on both sides.


Remove muffins from the griddle and let cool completely on a wire rack. This is a VERY important step. When these muffins come off the griddle, they continue to bake internally. This is called carry over baking. If you slice a hot english muffin in half before it has the chance to cool, the center will be gummy because it hasn't finished baking yet. So be patient. It'll pay off! When they are cool, slice open a muffin and spread with butter, jam, honey, cream cheese, or delicious Cinnamon Honey Butter


Homemade English Muffins

recipe adapted from Allrecipes.com

Ingredients:

1 cup milk
2 Tbsp granulated sugar
2 1/2 tsp yeast
1 cup warm water
1/4 cup Crisco, melted
6 cups flour
1 tsp salt
cornmeal, for dusting

Directions:

In a small bowl, pour the yeast onto the warm water. Set aside for 10 minutes, allowing the yeast to activate and become bubbly.

Meanwhile, heat milk in a small saucepan over medium heat until it bubbles around the edges. Add the sugar, stirring until dissolved completely. Remove from heat.

In the bowl of a stand mixer fitted with a dough hook, combine heated milk and sugar mixture, yeast, melted shortening, and 3 cups of flour. Stir on medium speed until combined. Add salt and remaining 3 cups of flour, continuing to stir on medium speed until the dough comes together to form a soft dough. Keep the stand mixer running on medium speed for 10 minutes, kneading the dough.

Place kneaded dough in a well-oiled bowl. Cover with a towel and place in a warm space in your kitchen. Allow dough to rise for 1 - 1 1/2 hours until doubled in size.

Punch down dough. On a lightly floured surface, roll dough out to 1/2" thickness. Cut circles out of the dough using a round cookie or biscuit cutter. Line a baking sheet with wax paper or a silpat and dust with cornmeal. Place the circles of dough onto the cornmeal covered baking sheet. Sprinkle the tops of the rounds with cornmeal. Allow rounds of dough to rise 30 minutes more on the baking sheet.

Preheat griddle to medium heat and spray with cooking spray. Cook muffins 12-14 minutes per side, until browned. Allow to cool completely on a cooling rack before slicing. Toast and serve with honey, jam, butter, cream cheese or Cinnamon Honey Butter.

Saturday, January 14, 2012

No Fail Popovers

To me, popovers are just about the coolest chemical reaction there is in baking. I know how nerdy that sounds, but the first time I successfully made a batch that actually "popped" up in the oven, I was thrilled! I tried several recipes that resulted in dense, eggy, deflated popovers and my baking self-esteem deflated with each failed, un-popped batch! But don't worry, you're not likely to experience failure this this recipe. It is quick, easy, and no fail! If you've never had a popover, they are the quick answer to a dinner roll, taking only 40 minutes from start to finish as opposed to the hours involved in making rolls from a yeast-based dough. Popovers are fantastically blank canvases. You can bake them plain or add some fresh herbs or cheese to the batter to spice them up. They are great with soups or stews because popovers are hollow in the middle, perfect for scooping. A giant air bubble forms on the inside of these as they bake. How does that happen? Time for a quick chemistry lesson.

The popover batter is mixed vigorously in a blender. This incorporates a lot of little air bubbles into the batter. While you prepare the popover batter, the muffin tin is getting hot in the oven. When the batter is poured into the preheated muffin tin, the batter seals on contact with the hot metal, instantly forming the bottom of the popover. The heat from the oven quickly solidifies the top of the popover, trapping all of the tiny air bubbles incorporated during the mixing process in the center of the popover. While the center slowly bakes, all the air bubbles coalesce into one giant air bubble, causing the center of the popover to expand. This is how they earned their name. The expansion of the air bubble in their center literally causes them to "popover" the top of the muffin tin. They start out as a runny batter and end up colossal and delicious.


Preheat oven to 400 degrees F. Grease muffin tin or popover tin with cooking spray. When the oven is heated, place the greased tin in the oven to preheat. It only needs to be in there for 5 minutes prior to baking.


In your microwave, melt butter and warm milk simultaneously. Stir.


Crack both eggs into the blender, blending until the eggs turn yellow and frothy.


With the blender running, pour a small, steady stream of the hot milk, butter mixture into the beaten eggs. 


Turn blender off and add flour and salt. Pulse to combine, scraping the sides of the blender and pulsing again to make sure all the dry ingredients are fully incorporated. If adding herbs or cheese, do this on this step, adding with the flour and salt.


Remove heated tin from the oven. Fill each slot 3/4 way full with batter. Return filled tin to the oven and bake for 35 minutes. DO NOT OPEN THE OVEN during baking. 


If you have a window in your oven door, you can keep track of the progress of your popovers. 10 minutes into baking, they look like this. A few minutes later.......


they'll look like this! When they stop expanding, they are NOT done baking. When the outside is golden brown, they are still not done baking. Removing the popovers from the oven before the 35 minutes are up results in deflated popovers. 


Remove from the oven and let cool for a minute or two. The popovers are best served warm on the day they are baked.

No Fail Popovers 

recipe adapted from foodnetwork.com

Ingredients:

1 cup milk, warmed
2 Tbsp unsalted butter, melted
2 eggs, room temperature
1 cup flour
1 tsp salt 
1 Tbsp of parmesean cheese or chopped fresh herbs, if desired. 

Directions:

Preheat oven to 400 degrees F. Grease a muffin tin or popover tin with cooking spray. Preheat tin in the heated oven while preparing popover batter (about 5 minutes).

In a microwave-safe liquid measuring cup or bowl, heat milk and melt butter. Stir. Set aside.

Mix eggs in blender until yellow and frothy. With the blender running, add the heated milk, butter mixture to the eggs in a thin, steady stream. Turn off the blender and add flour, salt, and cheese and herbs if desired. Pulse until batter is smooth, scraping the sides of the blender with a rubber spatula and pulsing a few times more to ensure the dry ingredients are fully incorporated.

Remove hot muffin or popover tin from oven and fill each compartment 3/4 way full. Return filled tin to oven and bake for 35 minutes. DO NOT OPEN THE OVEN DOOR DURING BAKING. The popovers are done when golden brown and crisp on the outside. Serve warm.

Saturday, January 7, 2012

Cheddar Chive Biscuits

Both sides of my family have roots in Kentucky, so biscuits were just one of those ever-present foods growing up in my house. I first fell in love with them when I was served biscuits slathered in my mom's sausage gravy for breakfast. Since then, I've had a weakness for this southern staple. I love how you can flavor a biscuit with pretty much anything-herbs, black pepper, cheese, cheese, cheese!!-and end up with a fluffy, buttery final product. Charles Schultz of Peanuts fame said "Happiness is a warm puppy." For this foodie, happiness is a warm biscuit!

Following my family's traditions, my biscuits MUST include tangy, thick buttermilk and must be baked in a cast iron pan. If you don't have a cast iron pan, these can be baked on a parchment or silpat lined sheet pan. If you don't have a cast iron pan and want the circular look of biscuits baked in a cast iron pan, a pie tin will do the trick!


Preheat the oven to 400 degrees and lightly butter a cast iron pan or line a baking sheet with parchment paper.


Whisk flour, baking powder, salt, pepper, and sugar together. Add the COLD, cubed butter. The colder the butter, the flakier and fluffier the biscuit.


Cut the butter into the dry ingredients with a pastry blender until the  mixture looks like....


This! The butter is the size of peas and the mixture has a coarse sand texture.

Stir in chives and 5 Tbsp cheese. (If you don't feel like using your knife, it's very easy to snip your chives into small pieces with kitchen scissors.) Make a well in the center of the dry ingredient butter mixture. This ensures even mixing of the dry and wet ingredients.


Pour the buttermilk into the center well in the dry ingredients and mix until the dough comes together. The dough should be slightly sticky. 


Turn the biscuit dough out onto a lightly floured surface and pat into a rectangle 1/2 inch thick. (No need to roll out the dough! Isn't that great??)


Using a lightly floured biscuit cutter, cut the dough, gathering and re-shaping the scraps to get as many biscuits as possible.


Place biscuits in cast iron pan (or on baking sheet) and brush tops with buttermilk. Top with remaining cheese. Bake in oven for 20 minutes until the tops of the biscuits are golden brown. 


Serve immediately. This recipe yields 16 biscuits if using a 2 1/2 inch biscuit cutter. 

Cheddar Chive Biscuits

recipe by Sweet & Savory

Ingredients:

2 cups flour
1 Tbsp baking powder
1 tsp salt
1/4 tsp black pepper
1 tsp sugar
1/2 cup (1 stick) unsalted butter, cold and cubed
1/2 cup chopped chives
1/2 cup cheddar cheese,divided
3/4 cup buttermilk, plus extra for brushing

Directions: 

Preheat the oven to 400 degrees F. Lightly butter a large cast iron pan or line a baking sheet with parchment.

In a large mixing bowl, whisk flour, baking powder, salt, pepper, and sugar until combined. Cut in cold, cubed butter with a pastry blender until butter is the size of peas and mixture resembles coarse sand. Stir in 5 Tbsp cheese and chopped chives.

Make a well in the center of the mixture. Pour in buttermilk and stir until the dough comes together. Turn dough out onto a lightly floured surface and pat into a rectangle 1/2 inch thick.

Using a lightly floured biscuit cutter, cut as many biscuits as possible, gathering and re-shaping the scraps to cut more biscuits. Place biscuits into cast iron pan or baking sheet. (if you are baking them on a baking sheet, evenly space them leaving 2 inches between each biscuit.) Brush the tops with more buttermilk and top with remaining cheese.

Bake for 20 minutes, until the tops of the biscuits are golden brown.